13.4. GLOBAL SETTINGS
The GLOBAL SETTINGS panel is where the cluster administrator defines the networking details for the primary LVS router's public and private network interfaces.
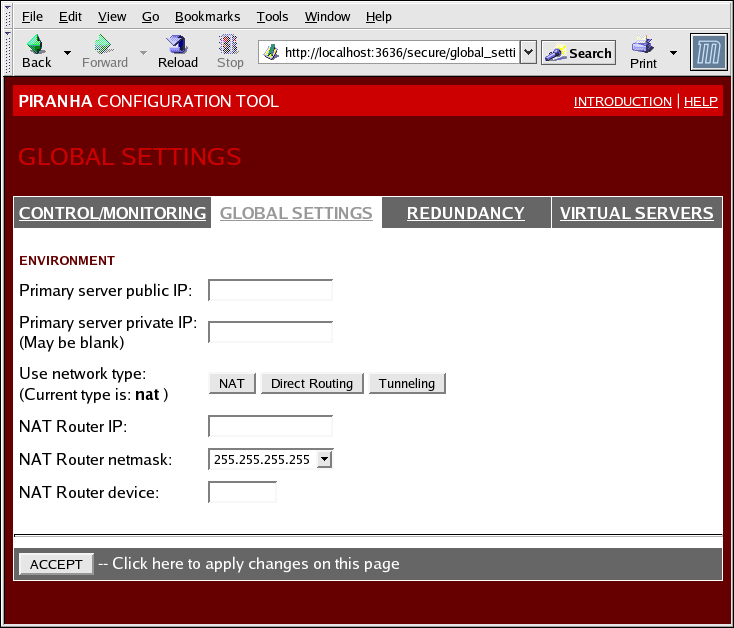
The top half of this panel sets up the primary LVS router's public and private network interfaces. These are the interfaces already configured in Section 12.1.1 Configuring Network Interfaces for a NAT LVS Cluster.
- Primary server public IP
In this field, enter the publicly routable real IP address for the primary LVS node.
- Primary server private IP
Enter the real IP address for an alternative network interface on the primary LVS node. This address is used solely as an alternative heartbeat channel for the backup router and does not have to correlate to the real private IP address assigned in Section 12.1.1 Configuring Network Interfaces for a NAT LVS Cluster. You may leave this field blank, but doing so will mean there is no alternate heartbeat channel for the backup LVS router to use and therefore will create a single point of failure.

Tip The primary LVS router's private IP can be configured on any interface that accepts TCP/IP, whether it be an Ethernet adapter or a serial port.
- Use network type
Click the NAT button to select NAT routing.
The next three fields deal specifically with the NAT router's virtual network interface connected the private network with the real servers.
- NAT Router IP
Enter the private floating IP in this text field. This floating IP should be used as the gateway for the real servers.
- NAT Router netmask
If the NAT router's floating IP needs a particular netmask, select it from drop-down list.
- NAT Router device
Use this text field to define the device name of the network interface for the floating IP address, such as eth1:1.
Tip You should alias the NAT floating IP address to the Ethernet interface connected to the private network. In this example, the private network is on the eth1 interface, so eth1:1 is the floating IP address.
 | Warning |
|---|---|
After completing this page, click the ACCEPT button to make sure you do not lose any changes when selecting a new panel. |