C.4. Cluster Members
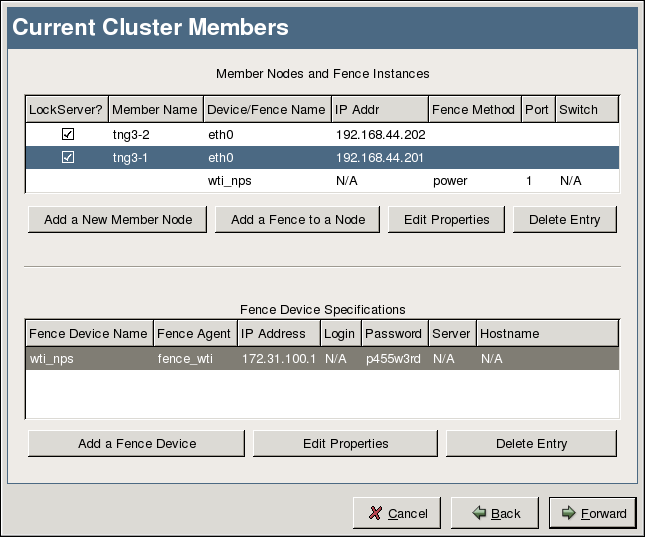
The next screen allows you to add, delete, and configure cluster nodes. You can also configure fence devices, which are hardware- or software-based devices used to perform shutdown or reboot of nodes that are expired or that need to be serviced. Figure C-4 shows the cluster and fence device configuration screen.
C.4.1. Adding a New Member
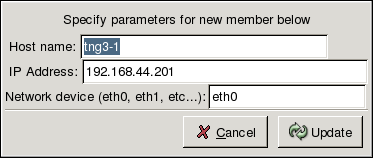
Click the Add a New Member Node to create a new cluster member. A window similar to Figure C-5 appears that prompts you to add the Host Name, IP Address, and Network Device of the member node. Once these values are entered, click Update to add the member to the system.
The added node appears within the Member Nodes and Fence Instances section. You can configure any member node by clicking the Edit Properties button. Clicking Delete Entry deletes the highlighted member node.
C.4.2. Fence Devices
To create an entry for a fence device, click the Add a Fence Device button in the Fence Device Specifications section. A window appears similar to Figure C-6.
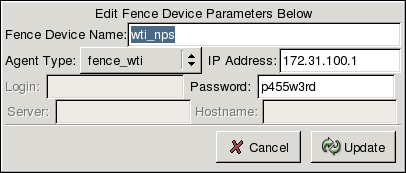
Enter a name (do not use spaces) in the Fence Device Name field. Then, choose the type of fence device using the Agent Type drop down menu. Depending on the fence device chosen, enter any required parameters. Available parameters include:
IP Address — The address of the device if it is a network power switch or Fiber Channel switch.
Login — The username that is entered to access the device.
Password — The password used to authenticate the username that accesses the device.
Server — The server name of the device (required when using the Global Network Block Device (GNBD) as a fencing method.
Hostname — The hostname of the device. This name must be addressable to the cluster either by DNS assignment or by static entry in each nodes /etc/hosts file.
 | Note |
|---|---|
For more information about the types of fence devices in the Agent Type drop down menu, refer to the chapter titled "Creating the Cluster Configuration System Files" in the Red Hat GFS Administrator's Guide. |
Once a fence device is added, you can reconfigure the entry by clicking the Edit Properties button. To delete a device, highlight its entry and click the Delete Entry button.
Finally, you can associate a fence device to a cluster member by highlighting the entry for the particular member and clicking the Add a Fence to a Node button in the Member Nodes and Fence Instances section. A pop up window appears allowing you to choose any configured fence device from a drop-down menu and associate to the chosen node. Depending on the fence device chosen, you may have to enter additional fence device specifications, such as the Port to which the member node is connected on the fence device. Once configured, click Update and the GFS Setup Druid shows the member node with the associated fence device(s) below it.
| Note |
|---|---|
You cannot delete a fence device listed in the Fence Device Specifications section if it is associated with a cluster node. You must first delete the fence instance(s) in the Member Nodes and Fence Instances section for that fence device before you delete the entry in the Fence Device Specifications section. |